

The Mould
By Filip Sochaj, Kraken Yachts Head of Design
Before there is a boat, there must a mould.
As a digression from the standard Birth of a Blue Water article, I want to take this opportunity to talk about one of the key parts of GRP yacht production; mould making.
All fibreglass boats need a mould. Due to the characteristics of the material, it is like a wet cloth before the resin cures and it will take almost any shape you ask of it. Think of making paper mache masks over balloons when you were a kid or on the inside of a salad bowl. The principle is exactly the same, it’s just the materials and expertise need to be different. What the balloon and salad bowl examples also show are the two different types of moulds, a male and female. The balloon is the male mould as the product is on the ‘outside’ while the salad bowl is a female mould with the product being ‘inside’. In terms of boat-building, there are quite a few differences and reasons why you would choose one or the other; male moulds are faster to build but female moulds give a very good outside surface finish and allow you to work inside the boat while the yacht is still sitting inside the mould. Here at Kraken, we prefer the female moulds for a better-suited result to semi-custom production. Female moulds also require a plug, let’s talk about that next.
Step One:
Make a Plug
A plug is essentially another boat. Moulds are made in the same way as a hull or deck, in FRP. So they also need something to give them their shape.
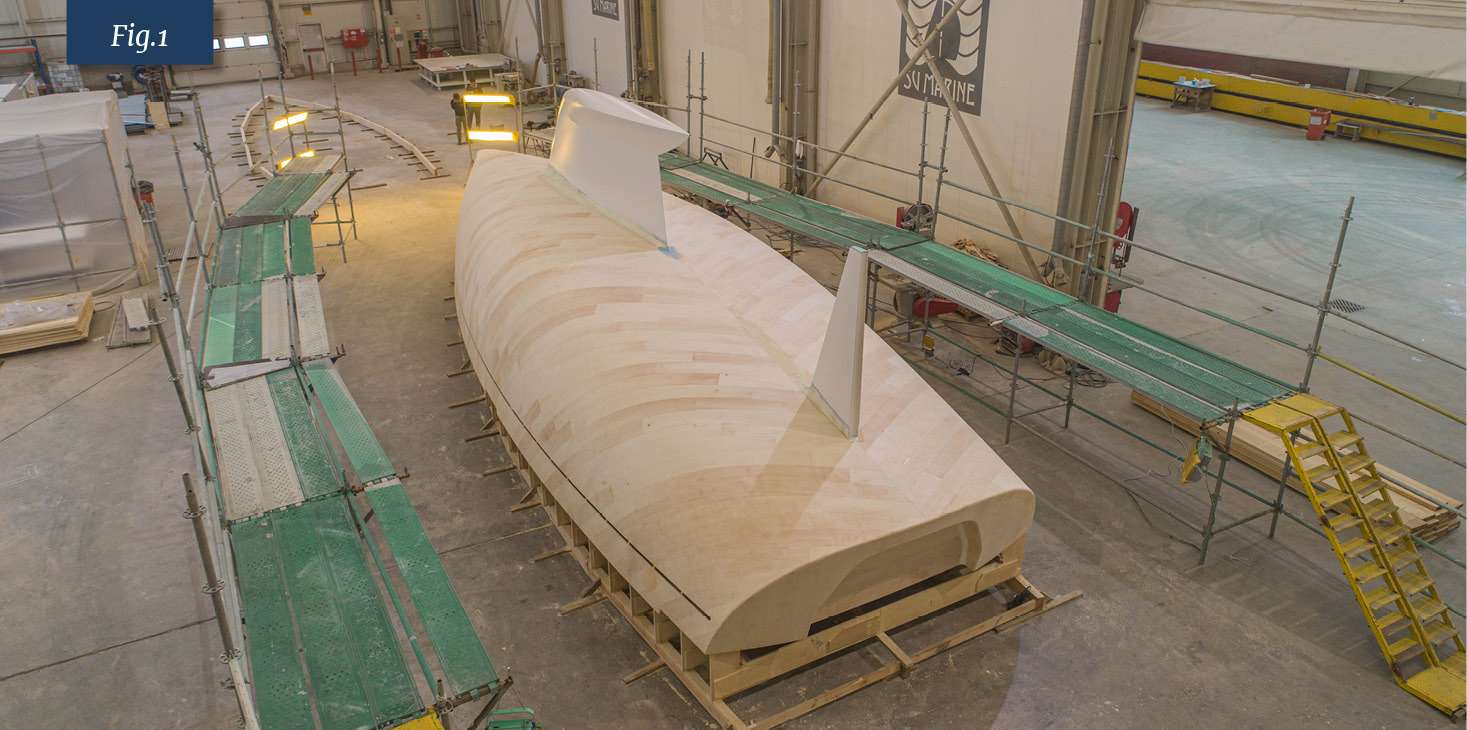
There are two main ways to build a plug, the more manual approach and the higher-tech 5-axis CNC approach. The manual approach takes wooden frames and stringers, covers them in wood planking, essentially creating a hull (See Fig.1 below). This hull is then faired, gel coated and is ready to make a mould on top of it. This method, while completely valid, requires a lot of skill and precision from the craftsmen to ensure the resulting hull is within tight tolerances and within the lines plan. It takes more time and labour costs and is really only suitable for one off production. The production process is similar to how yachts were produced in wood or ply back in the day. One of the yachts I am racing on is a wooden plug converted into an actual race boat and it is keeping up with the fleet very well.
When we started work on the K58 we have decided to go for 5 axis CNC production of the plugs. CNC production offers a much higher level of precision compared to hand production and the finished result will be to Kraken’s very high quality and finish standards. In the age of computer design, every single detail on the boat is first modelled in 3D and 2D. If the drawing of the hull and the actual hull mould don’t match precisely, it’s a big problem for production.
The CNC Process
1. Design Review
For this project, we are working with Metyx. They have an amazing level of expertise in plug and mould making so we can work hand in hand with them to create the perfect moulds. Once the design is locked in by our design team, the hull and deck models are sent to Metyx who analyse them and determine how and where to split the plug during the cutting stage to optimise the production time and efficiency.
2. Metal Frame
Most of the plug is foam and filler. To give it the necessary strength the first step is constructing a metal frame throughout the hull that will be the foundations of the plug. Approximately 650m of steel box section will be used. Plywood boards are then screwed onto the metal frame to act as supports for the foam in the next step.
3. Foam
Big foam blocks are glued onto the frame. Mostly 30kgm3 foam is used. The foam is added so that the finished shape is bigger in all directions than the intended final hull. (See Fig.2)
4. Foam Cutting
Now the actual work begins, the huge 5 axis machine which has its own hall, starts to cut the foam. The first cut is quite course and goes 10mm deeper than the final finish surface of the hull mould is required to be.
5. Initial Lamination
To lock in the shape of the foam and prevent distortion, the resulting shape is covered in two layers of fibreglass.
6. Applying Putty
An epoxy-based plug putty is applied to the whole plug. Again, the thickness is such that there is always excess material for the machine to take off. (See Fig.3)
7. Final Cutting
The 5-axis CNC machines the plug over a few passes, each time with a finer router bit, until it is left with almost a perfect surface. This is the big benefit of this approach in that it will create a perfect reflection of the intended design. (See Fig.4)
8. Sanding & Painting
With machine work over, it’s down to the skilled finishing specialists to put the final touches on the plug and apply all the primer and gelcoat required for mould making. The finished product will look like an upside-down hull of a boat. (See Fig.5)
Step Two:
Create a mould from the plug
Much like making the actual FRP boat, the mould has to be laminated with many layers of composite:
- First, the plug is prepared for mould making. The flanges need to be established. These are required as ‘mating’ surfaces for the moulds to lock onto each other later in the process. The mould maker will also prepare special recess and hump areas that are interlocking and make mould matching easier in the future.
- The plug will be waxed in preparation for lamination.
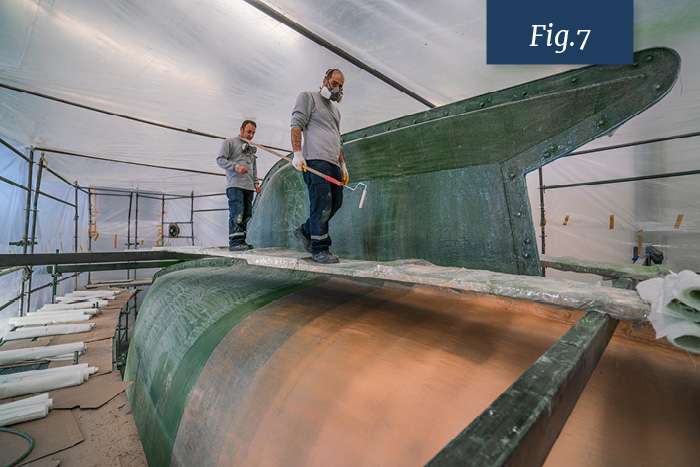
- Mould gelcoat is sprayed. (See Fig.6)The first CSM (chopped strand matt) is applied, these are called the skin coat and often will be of lower gramature to prevent print-through into the gel coat (fibreglass texture seen through the gelcoat). (See Fig.7)
- Then the rest of the material is laminated to provide a skin thickness of at least 20mm which roughly translates to 30 layers of matt.
- To give the mould more stiffness, foam stringers are added and laminated over onto the mould.
(See Fig.8) - Finally, the metal frame that supports the mould is constructed. The initial metal bars are laminated onto the mould surface and the rest of the frame is welded to that. (See Fig.9)
Now the finished mould is ready to be flipped the right way up and shipped off to the lamination warehouse where it will be the beginning the many boats to come. (See Fig.10)
By building moulds in this way we not only ensure speed and precision but also longevity. A well made mould like this, that is also stored in good conditions, can make as many as 100 products and some of the very skilled people we are working with have moulds that are well over that and with no sign of deterioration.
What comes next?
In the next instalment, we will focus on the structures of the craft. Yet another interesting topic, specifically given our unique design approach to keels, skegs and more.