
Almost all sailors I know have complained about the quality, or lack of bread in a particular global location, and most of them have resorted to baking their own, writes Fil Sochaj. The aroma of a fresh loaf can keep morale high on a long passage, especially in heavy weather.
Most bake with dry yeast, but sourdough is the preferable ingredient on a yacht, for the following reasons:
Flavour: Nothing comes close to a good loaf baked with sourdough starter
Texture: The bread is more chewy and robust when compared to dry/wet yeast bread but with the right process (high hydration dough) it can be very light and airy Nutrients: If you have to eat bread, you can’t do much better than sourdough, especially baked with wholewheat and rye flour. The yeast bacteria in the sourdough starter is better for
gut health.
Longevity: Sourdough bread keeps much better and longer. I like baking a 60% rye and 40% whole wheat bread, it lasts for a week easily.
Sourdough Starter
To bake any sourdough bread you will need some sourdough starter. Quite simply you need to mix equal parts of flour and water together and let it sit. A lot depends on the flour you use; it cannot be bleached, must have high protein content ( at least 12-13%) and is best if it is organic. For most of my baking, I use a rye starter as I like the slightly more acidic flavour. Rye is also a very easy flour to make sourdough starter from, it is very forgiving. The step by step procedure is outlined below:
- Prepare a jar or container in which you will keep your starter, should be around 1 litre in volume.
- In the jar, mix 50g of flour and 50g of drinking water, not tap water. Let it sit, covered but not sealed for about 24hours.
- After 24h add 100g of flour and 100g of water, mix well with a plastic or wooden spoon and again let it sit for 24hours. This time you might see some activity inside the jar – a good sign.
- On the third day, you should have 300g of mass in your jar, discard 200g into the bin and replace it with another 100g of flour and 100g of water.
- Repeat on day four.
- Repeat on day five.
- Sourdough starter should be ready around day six or seven depending on temperature and flour quality. It should be very glutinous and have lots of bubbles formed within it as Fig 1 shows

Sourdough Starter Tips and Tricks
As you may have noticed, when making the sourdough starter and later when maintaining it, you should stick to 1:1:1 proportion. That means for 1g of existing starter in the jar you need 1g of flour and 1g of water. This feeding amount does not need to change ever.
When the starter is kept in cabin temperature it should be fed roughly every 24 hours, but I went 72 hours once, between feed times, you will just need a day to coax it back to full potential.
If you are not baking bread daily it is best to keep the starter in the fridge, that way you only need to feed it once every week or so.
Remember, a sourdough starter is a living organism and it needs to eat, if there is no food it will die, but if it has food it will go on forever. A friend of mine has a 35-year-old starter which is doing fine.
Don’t mix flour types in the same starter. A rye starter can only be fed with rye flour and wheat starter can only take wheat flour. You will not kill it straight away but after a few days of feeding the wrong flour, it will be all but dead.
Instead of discarding the unwanted starter in the bin each day, it can be used to make sourdough pancakes. Good with a mixture of grated garlic and chopped spring onion.
Baking bread
There are a thousand and one recipes for sourdough bread and I strongly suggest you experiment to find your perfect one, but they all follow the same principle. Below is a recipe for the simplest bread I know which I cook quite often:
The first step of the bread-making process is getting the starter ready. A general rule is, when the starter has been fed, it will be ready to use once it has doubled in size. As fig.2 shows, a good tip is to use an elastic band to show the level of the starter after feeding
Remember the 1:2:3 ratio. 1 part of sourdough starter, two parts of water and three parts of flour

For a standard loaf use 200g of starter, 400g of water and 600g of flour.
Amount of salt is up to you, but don’t use too much or it will kill the yeast. I will use 15g of salt for this size of bread
Mix the water, flour and salt together and let it sit for 30 minutes. The wait is not absolutely necessary but helps with gluten development
Add in the sourdough starter and mix it in well by hand, let it sit for 30 minutes to an hour, covered.
Knead the bread. There are many ways and all of them are hard to explain without writing a book on the subject but the easiest way is to just “go at it” for about 8-10 minutes until the dough can be stretched very thinly between your fingers without breaking. For a different, easier and less messy way I suggest checking out Food Geek on YouTube and his amazing guides. When done, let it proof in a covered bowl for about 3-5 hours or until doubled in size


First shaping – roll the dough around the counter in a circular pattern with your hands on either side to build up surface tension on the top of the dough ball. Fig.4 shows the smooth surface of the dough after shaping
Let it sit on the counter covered for 30 minutes
Second shaping, Same as first shaping. At the end transfer it to a well-floured banneton or if you don’t have one, a bowl lined with a clean kitchen towel and dusted with flour. Cover it with a damp cloth or cling film. Fig.5 shows the dough inside the banneton.
Final proofing, this can be 4-5 hours in room temperature or overnight in the fridge.
If you’re short of time you could skip step 6-10 and after mixing all the ingredients well, just dump it into a buttered cake tin and go straight to the final proofing. This will result in a quite dense but very tasty bread. Works best with a whole wheat and rye flour mix.
It is important to have a steam environment when baking the bread. There are two ways to achieve this:
Easiest one is to bake the bread in a cloche or casserole pan with the lid on. This way you bake with the lid on for the first 20 minutes, take the lid off and bake additional 15-20 minutes to get the crust you want
The other way is to add a pot of boiling water to the oven when you put the bread in. The water will evaporate and create the steam you need.
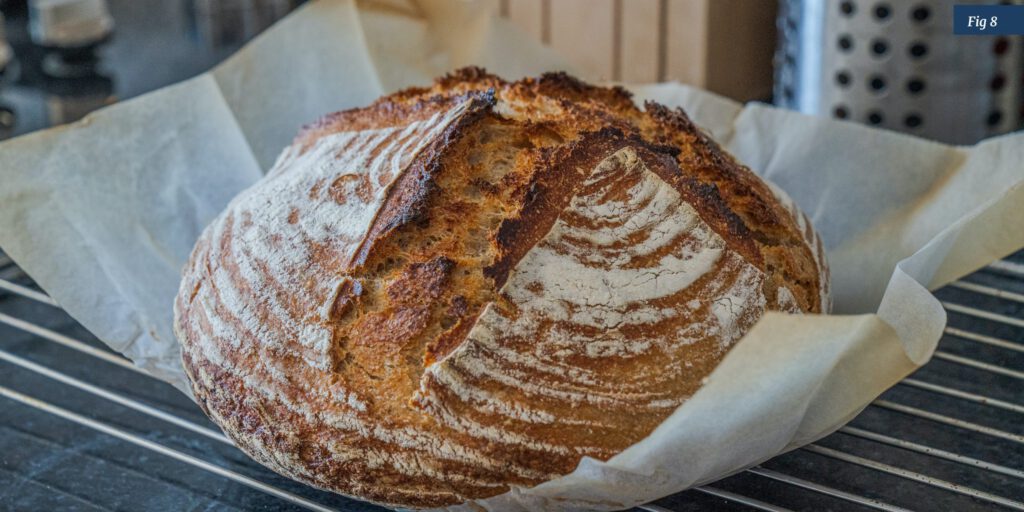
Score your bread! Scoring your bread on top before baking ensures the bread has somewhere to go as it grows in the oven making for a lighter more open crumb.